|

|
|
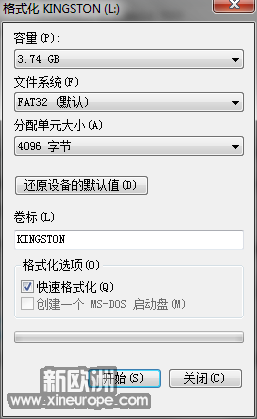
Requirements: *USB Flash Drive (Minimum 4GB) *Windows 7 or Vista installation files. Follow the below steps to create bootable Windows 7/Vista USB drive using which you can install Windows 7/Vista easily. 1. Plug-in your USB flash drive to USB port and move all the contents from USB drive to a safe location on your system. 2. Open Command Prompt with admin rights. Use any of the below methods to open Command Prompt with admin rights. *Type cmd in Start menu search box and hit Ctrl+ Shift+ Enter. Or *Go to Start menu > All programs > Accessories, right click on Command Prompt and select Run as administrator. 3. You need to know about the USB drive a little bit. Type in the following commands in the command prompt: First type DISKPART and hit enter to see the below message. Next type LIST DISK command and note down the Disk number (ex: Disk 1) of your USB flash drive. In the below screenshot my Flash Drive Disk no is Disk 1. 4. Next type all the below commands one by one. Here I assume that your disk drive no is “Disk 1”.If you have Disk 2 as your USB flash drive then use Disk 2.Refer the above step to confirm it. So below are the commands you need to type and execute one by one: SELECT DISK 1 CLEAN CREATE PARTITION PRIMARY SELECT PARTITION 1 ACTIVE FORMAT FS=NTFS (Format process may take few seconds) ASSIGN EXIT Don’t close the command prompt as we need to execute one more command at the next step. Just minimize it. 5. Next insert your Windows7/Vista DVD into the optical drive and check the drive letter of the DVD drive. In this guide I will assume that your DVD drive letter is “D” and USB drive letter is “H” (open my computer to know about it). 6. Maximize the minimized Command Prompt in the 4th step.Type the following command now: D: CD BOOT and hit enter.Where “D” is your DVD drive letter. CD BOOT and hit enter to see the below message. 7. Type another command given below to update the USB drive with BOOTMGR compatible code. BOOTSECT.EXE /NT60 H: Where “H” is your USB drive letter. Once you enter the above command you will see the below message. 8. Copy your Windows 7/Vista DVD contents to the USB flash drive. 9. Your USB drive is ready to boot and install Windows 7/Vista. Only thing you need to change the boot priority at the BIOS to USB from the HDD or CD ROM drive. I won’t explain it as it’s just the matter the changing the boot priority or enabling the USB boot option in the BIOS. Note: If you are not able to boot after following this guide means you haven’t set the BIOS priority to USB. If you got any problem in following this guide feel free to ask questions by leaving comment. Update: If you find this guide difficult to follow, please use the easy-to-use guide to create a bootable USB to install Windows 7 using official tool. |
回复 猫咪VS鱼片 开机F8 然后进入修复模式 选择命令提示 然后打命令进入win7安装文件夹 选择setup.exe安装即可 |
| 对的 不过其实和ultraiso差不多 |
| {:12_502:}微软有 win7 usb install这个软件下的,啥都不用调,vista也能用。。。。。。。 |
好像mac机不支持u盘启动吧 没试过优盘,但是硬盘光驱甚至是ipod都可以,网络也很简单,安装光盘甚至提供了windows下的网络安装的傻瓜向导 至于u盘我觉得在硬盘工具里使用镜像还原到优盘应该也能启动吧,不过只是猜测,没试过 |
|
本帖最后由 at_wfg 于 2010-2-12 23:56 编辑 写的很细,支持一下! 另外,其实对很多新手来说,即使是U盘安装对他们来说都是比较有难度的操作,我个人更建议用硬盘安装工具nt6 hdd installer来安装nt6内核的操作系统,目前最新版本是V2.8.5,和之前的V2.8.1更傻瓜化。当然,对于已经中毒或系统已经无法进入的用户,还是得靠U盘辅助的。  nt6 hdd installer v2.8.5.rar
(365.78 KB, 下载次数: 3)
nt6 hdd installer v2.8.5.rar
(365.78 KB, 下载次数: 3)
图片教程太大,压上来,自己下载看吧。
图片教程.rar
(316.6 KB, 下载次数: 3)
|
 好像mac机不支持u盘启动吧 好像mac机不支持u盘启动吧 |
|
其实没几个bios像ibm的这么具体,很多bios简直简单的要命,更不用说兼容硬盘模式的u盘, 其实我很喜欢grub一类的多系统启动程序,就像bootcamp一样好用,无论是硬盘优盘还是光驱网络,只要能想得出来的外置存储硬件都能被当作启动安装的媒介,相信将来efi时代应该能普及了 可惜bootcamp只支持os x和windows,这点比较郁闷,好处是无论怎么改都改不掉系统开机启动程序, |
| 色狼400啊~ |
 差不多拉 差不多拉 |